This Oil-Free Vegan Pizza Dough has a puffy, chewy crust and is absolutely delicious. The trick is in letting the dough rise overnight and stretching it by hand. Top with all your favorites and this Neapolitan pizza cooks up in just 7 minutes. Family Pizza Night just got an upgrade!
My husband and I have been making homemade pizza for almost 15 years, and the recipe has gone through many alterations during that time (some better than others!), but we eventually hit on this simple method for making delicious Naples-style pizza dough that's perfect every time.
This Oil-Free Vegan Pizza Dough recipe contains a lot of tips so that you can avoid some of the mistakes we made, and while it might seem complicated at first glance, it's actually really straightforward and easy once you get the hang of it. You just need 6 simple ingredients and a little advance prep, and you, too, will be making the vegan pizza crust of your dreams!
Inspiration for this Vegan Pizza Dough Recipe
Confession: In 2011 we spent 6 days in Naples, Italy, (birthplace of pizza as we know it), and I ate the famous Napoli Pizza EVERY SINGLE DAY. Sometimes twice a day. I'm not even sorry. And that style of pizza -- thin with a pillowy, stretchy crust around the edge -- is exactly what inspired this recipe. (By the way, if you're ever in Naples, the classic Marinara Pizza is already vegan so no need to modify!).
You'll love this recipe for Vegan Pizza Crust because it's:
- Simple & Straightforward
- Stretchy, Chewy, & Pillowy Soft
- Oil-Free
- Dairy-Free
- Versatile
- Easy to Adapt for Different Types of Flour
- Perfect for Family Pizza Night
- An Approachable Adaptation of Neapolitan Pizza
Vegan Pizza Toppings
You can top your pizza with anything you like, but here are some of my favorite combos!
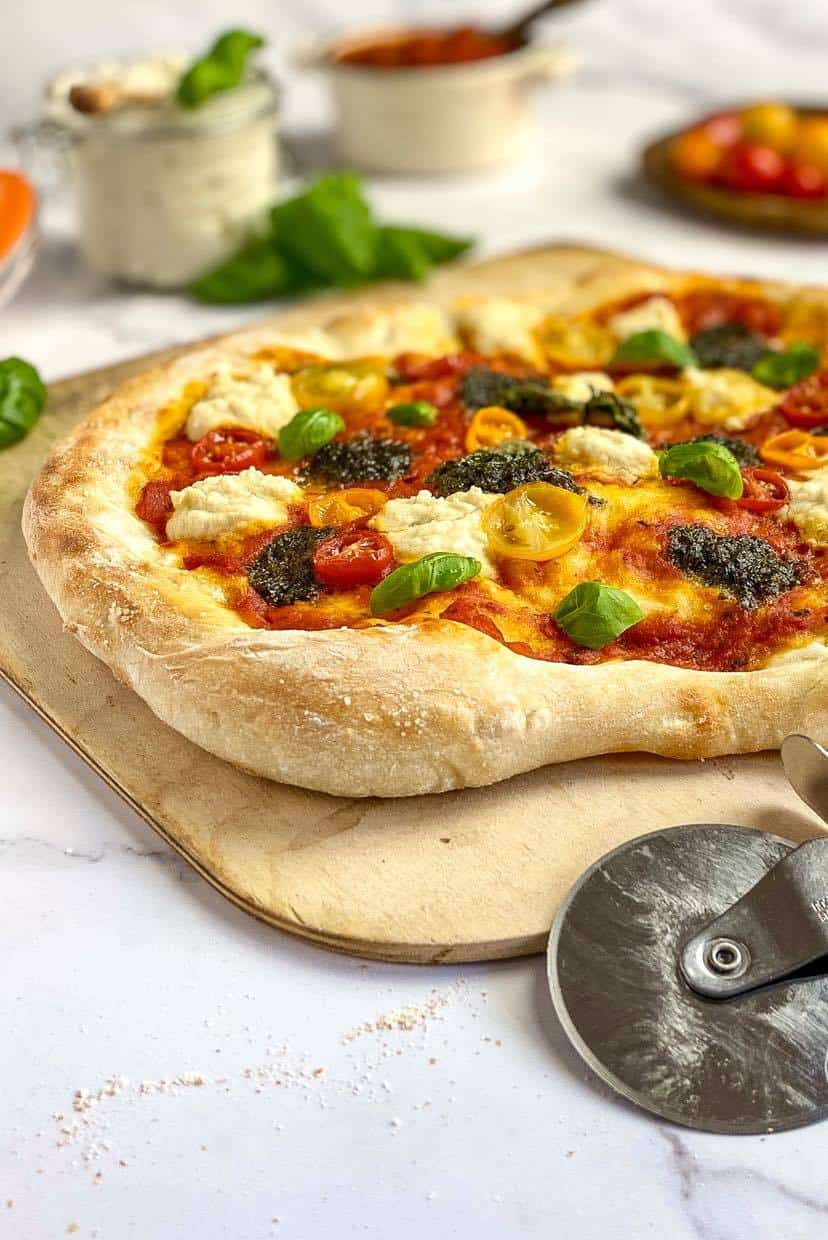
- Vegan Pesto Pizza with Almond Ricotta (shown below)
- BBQ Jackfruit with Cilantro and Red Onions
- Classic Supreme with Vegan Italian Sausage Crumbles
- Vegan Hawaiian Pizza with Pineapple and Tempeh Bacon or Vegan Bacon Bits
Other Ideas for this Vegan Pizza Dough
One of the things I love about this recipe is how versatile it is! We usually make a double batch and have a little leftover dough, so I've had plenty of opportunities to experiment. Here are just a few ideas for other recipes you can make with this dough:
- Vegan Calzones
- Vegan Pigs in a Blanket
- Mini Pizzas or Pizza Rolls
- Vegan Cinnamon Buns
- Flatbread
- Garlic knots
- Breadsticks
What type of flour makes the best Vegan Pizza Dough?
We have tried several different types of flour with this recipe -- including regular white (unbleached), spelt, and white whole wheat -- but we consistently get the best results with Pizza Flour, also known as Manitoba, Caputa Tipo, or Type 00.
If you can't find pizza flour, your next best option is bread flour. White, unbleached flour will also work. If you want a healthier dough, you can use half pizza flour and half white whole wheat. You can also use 100% white whole wheat flour, but you will need to make a few adjustments to how you prepare the dough (see below).
Can this Vegan Pizza Dough be 100% Whole Wheat?
I have tried this recipe with 100% white whole wheat flour, as well as half wheat and half pizza flour, and it always tastes great! However, the more whole wheat flour you use, the less gluten will be released, and the more the texture will change (it won't be quite as pillowy and stretchy).
While I don't recommend using regular whole wheat flour for this type of pizza dough (it can work with other styles), you can make this recipe with white whole-wheat flour. Here are some tips for making this Whole Wheat Vegan Pizza Dough.
- If you decide to make this half-and-half or 100% white whole wheat flour, the only difference in ingredients is that you might need a teeny, tiny bit more water.
- Be cautious when adding more water because too much will make the dough sticky. Instead of pouring water into the dough, wet your hands while kneading the dough. Repeat if necessary. This will add a trivial amount of water without going overboard.
- You might need to knead the dough for an extra 5 minutes (there is less gluten in whole wheat flour, and kneading it longer will help make the dough more elastic).
- The more whole wheat flour in the dough, the more likely it is to tear when transferring it to the pizza stone. I recommend using a square of baking paper between the pizza paddle and dough to help make the transfer to the pizza stone easier.
- The more whole wheat flour in the dough, the less easily you can stretch it with your hands using the steering wheel method I describe below. If you are using 100% whole wheat you might need to roll the dough flat with a rolling pin.
- On the day you plan to bake the pizza, it can also help to let the dough rise out of the refrigerator for 1.5 hours (instead of just 1 hour).
Ingredients you'll need to make
- water-- To proof the yeast you need lukewarm to warm water (not hot or you will kill the yeast!). (About 100F or 38C is ideal. You can measure with a thermometer, but getting to know the feel by touch is easier.)
- dry, active yeast --This is what makes the dough rise!
- sugar -- Just a little sugar to feed the yeast and help it activate. Be sure to use raw and/or organic sugar to keep this recipe vegan (regular white sugar is not always vegan).
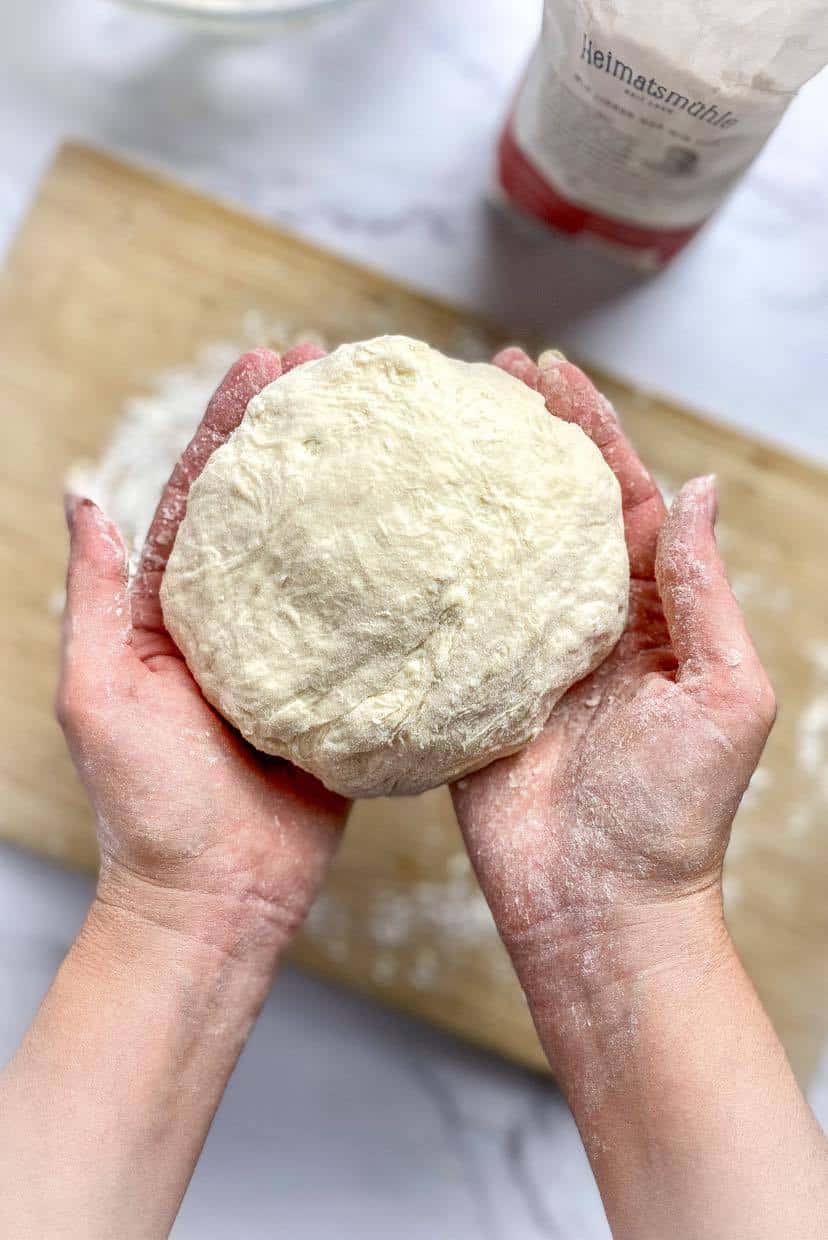
- flour -- I recommend Pizza Flour, also known as Type 00 (Caputo Tipo). This is the type of flour used in Naples Pizzerias and is what helps the center of the pizza to stay thin while the outer crust puffs up. However, regular unbleached white flour, white whole wheat flour, or a mixture of two will also work. See tips above.
- sea salt
How to Make the Best Restaurant-Style Vegan Pizza
- This dough needs at least 1 hour to rise, but ideally, you will make the dough and let it rise overnight in the refrigerator (24 to 48 hours in advance).
- To begin, add warmish water (not hot, about 100F or 38C) and sugar to a bowl. Stir to dissolve the sugar, add the yeast, and then let proof for 5 minutes. The yeast should bubble and foam a little.
- In a large mixing bowl, combine the flour and salt. When the yeast is activated, add it to the flour mixture.


- Stir the dough with a fork until mostly combined. Then use your hands to continue mixing. It might feel like there is too much flour, but there's not! The inside of the dough will be very sticky still, so you need to fold and knead the dough until almost all of the flour has been incorporated. (If you have a stand mixer, you can use that instead).
- Next, place the dough on a clean, well-floured surface or cutting board. Knead the dough for about 5 minutes. (If you don't know how to knead by hand, check out this tutorial video).


- Add a little more flour to the bowl you used earlier and return the dough to the same bowl. (The extra flour will help to keep the dough from sticking to the sides of the bowl so you can make this pizza dough without oil).
- Cover the bowl with a lid, plate, or towel. Place the bowl in the refrigerator and let rise overnight (up to 48 hours).
- (If you make the dough the day you plan to cook the pizza, let it rise on the counter, covered, for at least one hour. Skip the refrigerator step.)


- One hour before you want to cook the pizza, remove the dough from the refrigerator. Place the dough on a floured cutting board. Cut the dough in half and form two round discs. Place the discs on the cutting board, cover with a clean kitchen towel, and let rise for one hour.
- When you take the dough out, you should also place the pizza stone in your oven and preheat the oven to 500F or 260C. The pizza stone needs to preheat for at least 30 minutes!
- For a true Naples-style pizza, don't use a rolling pin!
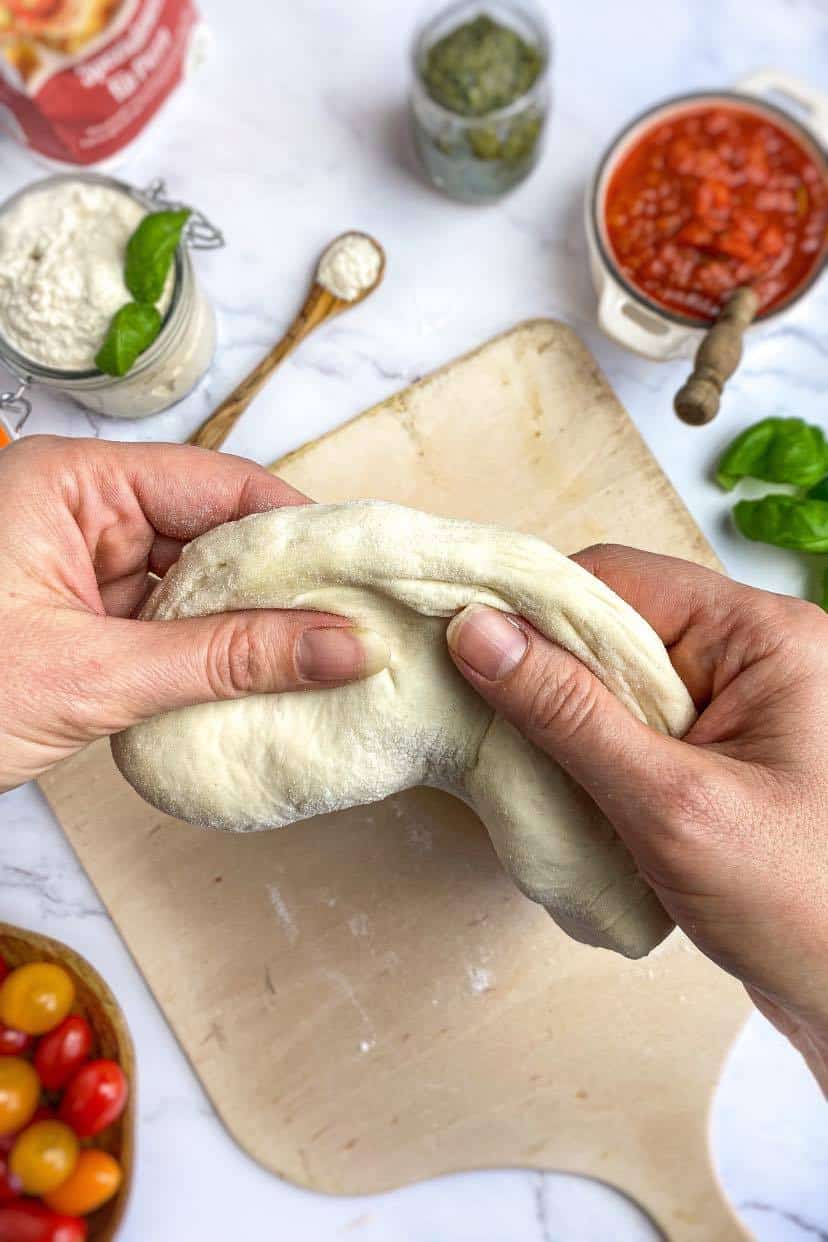
- To stretch the dough by hand simply hold the dough like a steering wheel, with your thumbs about an inch below the upper rim. Turn the dough in a circle and let gravity stretch it until reaches the right size. (Two to three rotations is usually enough.)


- Place the dough on the pizza paddle (add a piece of baking paper between the paddle and dough if you're new to this). You might need to stretch the dough a little more, but don't press it into the paddle.
- Sprinkle a handful of flour of cornmeal over the top of the pizza dough. Then flip the dough over so the flour side is down (this will help the dough to slide off the paddle onto the pizza stone).
- Add your favorite toppings (just be careful not to overdo it, this style of dough rips easily).
- Transfer the pizza from the paddle to the hot pizza stone (see tips below). Cook for 7 to 8 minutes and enjoy right away!
- This recipe makes two 14" pizzas. You will probably have to cook 1 at a time, due to the size of the pizza stone.


How to Store Vegan Pizza Dough
- It's ideal to let this dough rise in the fridge for at least 12 to 24 hours, but you can prepare it ahead of time and store it for up to 3 days in the refrigerator. After the initial rise period (24 hours), transfer to an airtight container so that the dough doesn't get too dry.
- This pizza dough can also be frozen and stored for up to 1 month. To defrost, transfer to the refrigerator and let sit overnight. If you find there is extra moisture on the dough after the defrost. simply add a little more flour and do a quick knead before letting the dough rise for 1 hour before cooking.
Tips for Using a Pizza Stone
- Always Preheat your oven with the pizza stone inside at very high heat (usually the highest your oven will go, 500F or 260C) for at least a half-hour before using the pizza stone. If you don't do this, the pizza stone won't be hot enough, the bottom of the crust won't brown properly, and you might have trouble getting the pizza in and out.
- Use a wooden pizza paddle to get the pizza on and off the stone. If you don't have a wooden paddle, we have also had some success with a flat cookie sheet, though you will definitely need to use parchment paper (see tip 5).
- Sprinkle a layer of flour over the paddle before placing the dough. This will help the pizza slide off more easily.
- To transfer the pizza to the stone, open the oven and slide the paddle at a slight angle toward the back of the stone, use a quick flip of the wrist to lift the pizza up while simultaneously pulling the paddle away. Sometimes, (usually depending on how heavy your toppings are) you will need to perform this move 2 to 3 times to get all of the pizza onto the stone. This takes some practice so don't feel bad if you mess it up. We've "ruined" many a pizza that we were still able to salvage.
- Consider investing in two pizza paddles so you can prep one pizza on the paddle while the other is cooking (this will leave one free to remove the cooked pizza from the oven.)
- If you are new to using a pizza stone, or you are planning to add a lot of toppings to the pizza, I suggest cutting a square of parchment paper and placing it on the pizza paddle under the dough *before* adding the toppings. This will help the pizza slide off the paddle and onto the stone more easily. About halfway through the cooking time, open the oven, use the paddle to lift the pizza, and pull out the parchment.
- A second set of hands can sometimes help by lifting the side of the dough farthest from the stone while the other person scoots the pizza off the paddle.

If this recipe for Vegan Pizza Dough speaks your language, check out:
- Vegan Ricotta Cheese
- Oil-Free Vegan Pesto
- Quick & Easy Marinara Sauce
- Vegan Italian Sausage Crumbles
- Penne Pasta with Kale & Vegan Italian Sausage
📖 Recipe
Neapolitan Pizza Dough (Vegan & Oil-Free)
Equipment
Ingredients
For the Yeast Starter
- 250 ml warm (not hot!) water (or about 1 cup and 2 tbsp)
- 3.5 g active, dry yeast (1 tsp)
- 4 g sugar (1 tsp)
Dry Ingredients
- 400 g pizza flour (type 00) (about 2 ½ cups)
- 5 g salt (1.5 tsp)
Instructions
Day 1
- Add the water and sugar to a small bowl and stir to dissolve the sugar. Add the yeast and let it proof for 5 minutes. It should bubble and foam a little.
- In a larger mixing bowl, whisk together the flour and salt.
- When the yeast is done proofing, add the liquid water/yeast mixture to the dry ingredients. Sitr with a fork until mostly combined. Then use your hands to finish mixing.
- Turn the dough onto a floured work surface and knead for 5 to 10 minutes.
- Spread a little more flour to the large mixing bowl. Put the dough in the bowl, cover, and put it in the refrigerator overnight.
- (If you choose to make this dough the day you plan to bake it, then let it rise, covered, on the countertop for at least an hour.)
Day 2
- Take the dough out of the refrigerator 1 hour before you plan to cook it. Place the dough on a floured surface, cut dough into two halves, and form two round disks. COver the disks with a kitchen towel and let rise.
- Place the pizza stone in the oven. Preheat the oven to 500F or 260C (or slightly higher if your oven gets that hot). (You need to heat the pizza stone for at least a half-hour before baking.)
- While the dough is rising, prep your toppings. Flour or add a baking sheet to the pizza paddle (see tips above).
- After 1 hour take one of the dough balls and sprinkle a little flour over the top. The dough should be stretchy and loose. Use your hands to stretch the dough in a 14-inch circle. To do this hold the disk like a steering wheel, with your thumbs a half-inch beneath to top rim. Turn the dough in a circle. Gravity will stretch the dough.
- Place the dough on the paddle. Sprinkle a little flour (or cornmeal) over the top and spread it lightly over the dough. Then flip the dough over so that the floured side is down.
- Add your toppings leaving about ½ to 1 inch of space around the rim of the circle. (Don't overdo it! This is a thin crust pizza and the dough rips easily).
- Transfer the pizza to the pizza stone and cook for 7 to 8 minutes (or until the crust is nicely browned). Remove the pizza from the oven.
- Repeat the process for the second pizza.
- Serve and enjoy right away!
Video
Notes
- Consider using a kitchen scale to weigh the water and flour, at least. This will be more precise than measuring with cups.
- If you don't have a pizza stone, you can still make this pizza using a baking sheet or pizza pan.
- For tips on using a pizza stone, see the blog post above.
- For tips on using whole wheat flour, see the blog post above.
Want access to my Exclusive Meal Planning Tips & Printables page?




Sharon B
I love this recipe! Having lived in northern Italy many years ago, I failed multiple times trying to replicate the wonderful pizza dough I enjoyed there. Who knew it was the flour! This dough came together easily with my stand mixer and dough hook. I followed the recipe exactly as written and made 4 beautiful pizzas for lunch. Thanks so much!
Julianne Lynch
Wow! Thank you so much! I'm really glad you liked it.
Lu
Hi there, I’m excited to try this pizza dough, having just returned from a trip to Italy! But I’ve tried 3 times now to get the yeast to activate and nothing happens, no foam, no nothing….what do you think I’m doing wrong?
Julianne Lynch
Hi Lu,
There could be a few things going on. It could be that the yeast you are using is expired or somehow deactivated. Another possibility could be that the temperature of the water is too hot. Here is an article that might help. https://feastandfarm.com/how-to-activate-yeast/
Lu
Hi Julianne,
Thank you so much for the link to the yeast activation, I watched it, tried it again, and everything worked out great! Love your recipe! Once I got the yeast to activate it was easy peasy and so yummy!! Wish I knew how to send you a pic haha! Anyway, thanks again for the recipe and the extra link, I plan on making it every week until I perfect it lol! 😉🍕
Julianne Lynch
Wonderful!! I'm so glad I was able to help. If you want to share a photo, you can post it on Instagram and tag me, or you can join my Facebook group (Easy Vegan Recipes & Tips) and post a picture there. Thanks!