Homemade a

When I first moved to Europe, I was shocked by how expensive almond butter was. Six to ten Euro for a teeny-tiny little jar that wouldn't even last a week! I decided to do a little price comparison, and I found that I could make my own almond butter for about a third of that price. So I bought a midrange food processor for 50 euro, which paid for itself in roughly twelve batches of almond butter. Now I'm saving money and using my food processer for all sorts of recipes!

Making Almond butter is easy if you have a food processor and a little patience. But if you've never done it before, the process can be a little intimidating. I'd say it's a no-fail recipe, but there is, in fact, one thing you can do to fail spectacularly. Guess how I know that. . .
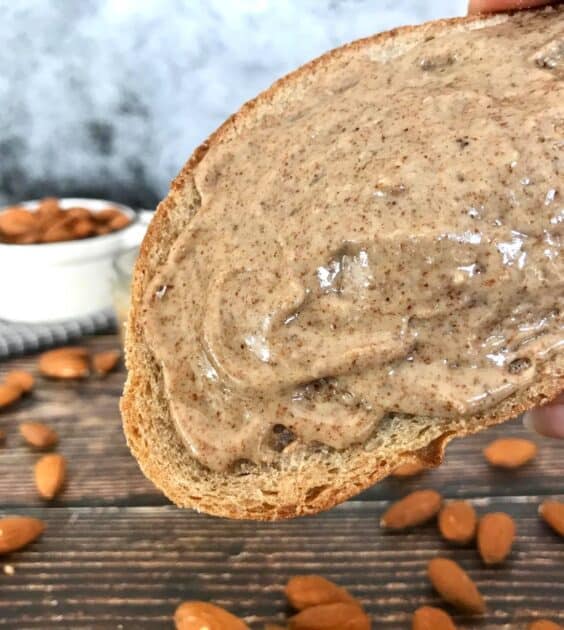
Thankfully, you don't have to make the same mistake I did because I'm going to walk you through the steps so that you can avoid doing the one sure-fire thing that will ruin your almond butter.

Pro tip: Almonds can be expensive depending on where you buy them. Most
YOu'll love this easy almond butter recipe because it's:
- Vegan
- Oil-free
- WFPB
- Kid-friendly
- Easy
- Budget-friendly
- Creamy and Delicious!
How to make
Start by roasting raw almonds on a baking sheet for 10 minutes at 325° F or 165°C. You can skip this step, but it will take longer to break down the almonds in the . (The first time I made this recipe I didn't roast the almonds first, which led to the fatal mistake. . . ).
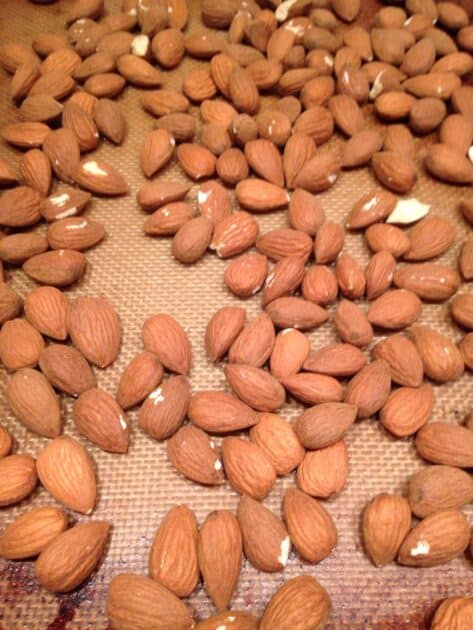
Once the almonds are done, take them out and pop them right into your *Food Processor. Turn to the highest setting and let it run until the almonds start sticking to the sides. At this point, you'll have a mixture that's quite coarse and resembles almond meal or almond flour.


Pro tip: You need a full-sized *Food Processor for this recipe. Unfortunately, a mini food processor just doesn't have the power or stamina to break the almonds down properly.
When you notice that the meal is sticking to the sides, stop the food processor, open the lid, and scrape down the sides with a spatula or scraper. (Be sure the food processor isn't running while you do this--unless you fancy a silicon-flavored almond butter!)


Close the lid and let the food processor run on high again. You'll have to repeat this process of stopping to scrape down the sides several times. It might start to seem like this mess will never turn into almond butter. JUST BE PATIENT! No matter what you do, don't make the same mistake I made the first time I tried this recipe. And without further ado, here's the most important bit:
DO NOT, UNDER ANY CIRCUMSTANCES, ADD WATER or OTHER LIQUID.
Yes, that's right. The first time I made almond butter, it took so long to start breaking down, that I thought I'd just help it along by adding a little water. Wrong move! Water and oil do not mix. (I ended up saving the mixture by adding dried dates and cocoa powder, thus turning
So back to making your almond butter. It might take a while, but trust me, it's worth the wait. Over the course of the next few minutes, you're going to start to see some magic happen. First, the meal will start to form tiny, pearl-like balls.
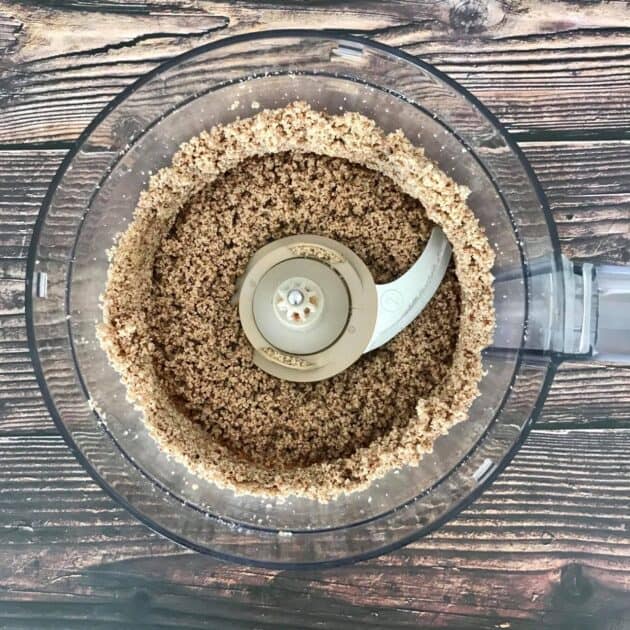
Then those pearl-like balls will start to congeal into a dough. If you're super lucky, you might even get to see this dough turn into a ball and roll around the food processor a few times before finally thinning into a magical substance we call almond butter.


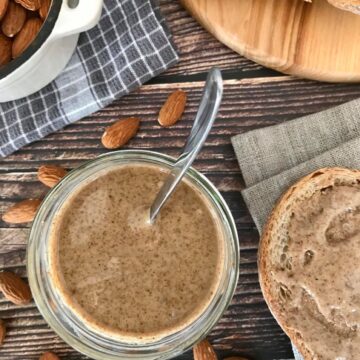
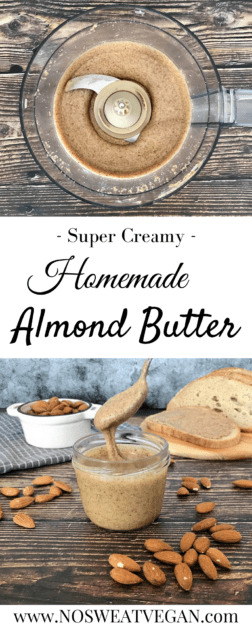
Now you might be tempted to stop here, and if you like dry, mealy almond butter, you can do just that. But if you're looking for the silky smooth butter you can buy at the store, you need to let the food processor run for another 2 to 5 minutes, at which point you'll have this gorgeous, shiny, creamy, scrumptious almond butter of your dreams.

Now and only now, you can feel free to add in any other flavorings--pink Himalayan salt, maple syrup--pick your poison. But this almond butter is so good, I don't add anything at all. Sometimes I just dip in a spoon and eat it right out of the jar! Now you've got your almond butter.
Variations
This method will work with almost any kind of nut-butter from peanut butter to cashew butter to pecan butter or anything else you can think of!
Add a pinch of cinnamon and a drizzle of maple syrup after the almond butter is done for a sweet variation.
How to store
Store in an airtight container in the refrigerator for up to 4 weeks. Stir before using.
How to serve
- It pairs amazingly with a tart-sweet apple like Pink Lady or Honey Crisp--or vegan apple muffins.
- Smear it onto toast and top it with banana slices and cinnamon for delicious breakfast.
- Spread it on your favorite healthy muffin. Some of my favorites include Blackberry, Zucchini, and Pumpkin.
- Or slather it between two slices of bread with some yummy apricot or chia jam for simple, take-you-back to childhood sandwich.
- Almond butter is great for baking! I've added it to my healthy Vegan Chocolate Chip Cookies and Oatmeal Raisin Cookies.

Related recipes
- Homemade Muesli
- Tempeh Bacon Sandwich
- No-Bake Carrot Cake Bites
- Super Simple Tofu Nuggets
- Vegan “Fish” Tacos
📖 Recipe
Homemade Almond Butter
Equipment
Ingredients
- 2 cups or 200 grams dry, unsalted almonds
Instructions
- Pour your almonds on a roasting sheet and place in the oven for 10 mintues on 325°F or 165°C. (No need to preheat.)
- Take the almonds out of the oven and place in a food processor.
- Blend almonds on high, stopping to scrape down the sides as needed. This might take anywhere from 2 to 10 minutes depending on the power of your food processor.
- After the almonds release thier oils and form a smooth paste, continue to blend another 3 to 4 minutes to improve creaminess.
- Store in an airtight glass container in the refrigerator for up to two weeks.
Notes
- Do not add water to the almonds while they are processing. Doing this will cause the almond butter to "break," and your almond butter will not come back together to form a smooth paste.
- Optional ad-ins include salt, cinnamon, maple syrup, cocoa powder, etc.
- This method will work with other types of nut butters, but if you want to make hazelnut butter, you'll need to remove the skins after the nuts come out of the oven. Just place the hazelnuts (about a ¼ cup at a time) into a clean kitchen towel and rub vigorously between your hands until the skins fall off.
Never miss a new recipe! Click here to sign up for email updates.
*Disclosure: Some of the links included in this post are affiliate links. That means that I could earn a commission, at no cost to you, if you click through and make a purchase.







Leave a Reply